Quest for the Ideal Fret Button Feel
I’ve spent a LOT of time and energy understanding the Guitar Hero fret buttons. Different guitars have different dimensions. Not much different, but different enough. I try to balance fit, feel, weight and strength to get the best fret button feel I can.
35 Flavors
I’ve identified 35 measurements and parameters that fully define one fret button. I measure all 5 fret buttons, and take the average of the dimensions. I enter these into a spreadsheet, then import into my model in Fusion 360.
Even with my best efforts, the fit was never ideal. I wanted a design where the fret button was restricted to up-and-down only, so the fret couldn’t lean to one side and get stuck in the guitar neck. I needed to figure out how to engage the two rectangular holes on the top of the fret switches, but I could never guarantee exact-enough dimensions to have a one-piece fret button that will fit the requirement.
Two is Better than None
I considered one-piece frets, frets with shims, hollow frets you fill with something, longer frets, short frets, flat-bottom frets. I settled on a two-piece, glue-together fret button that solves the problem by engaging the keycap holes at the top of the actual switch, this ‘keycap’ will be super-glued to the fret button, and this locks the bottom of the fret so there is no side-to-side movement, only up-and-down.
Why Two Parts Instead of One?
This goes back to the difficulty of ensuring that the little keyboard switch is placed precisely in relationship to the hole in the neck, for all 5 switches, for all possible production variations in the guitars. I don’t have precise guitar design specs, I have to reverse engineer with the small sampling of guitars I have access to. Close enough is good enough in this case.
The two part method allows for variations in dimensions and ensures an ideal fit between the neck and the fret and the switch.
All The Parts
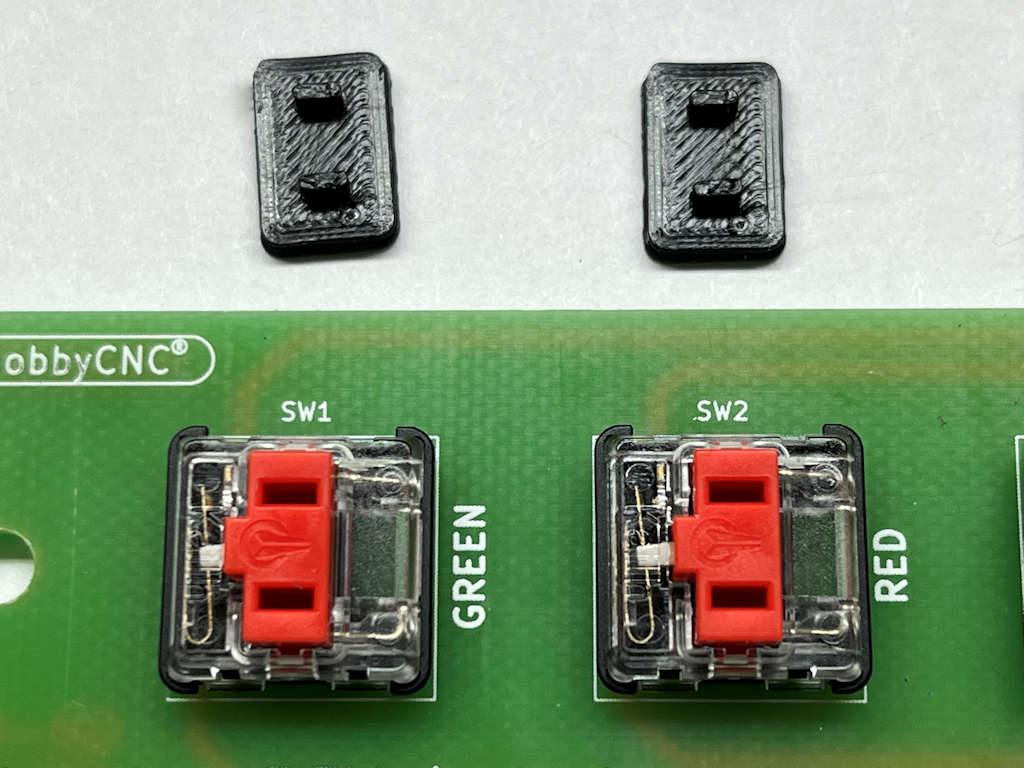
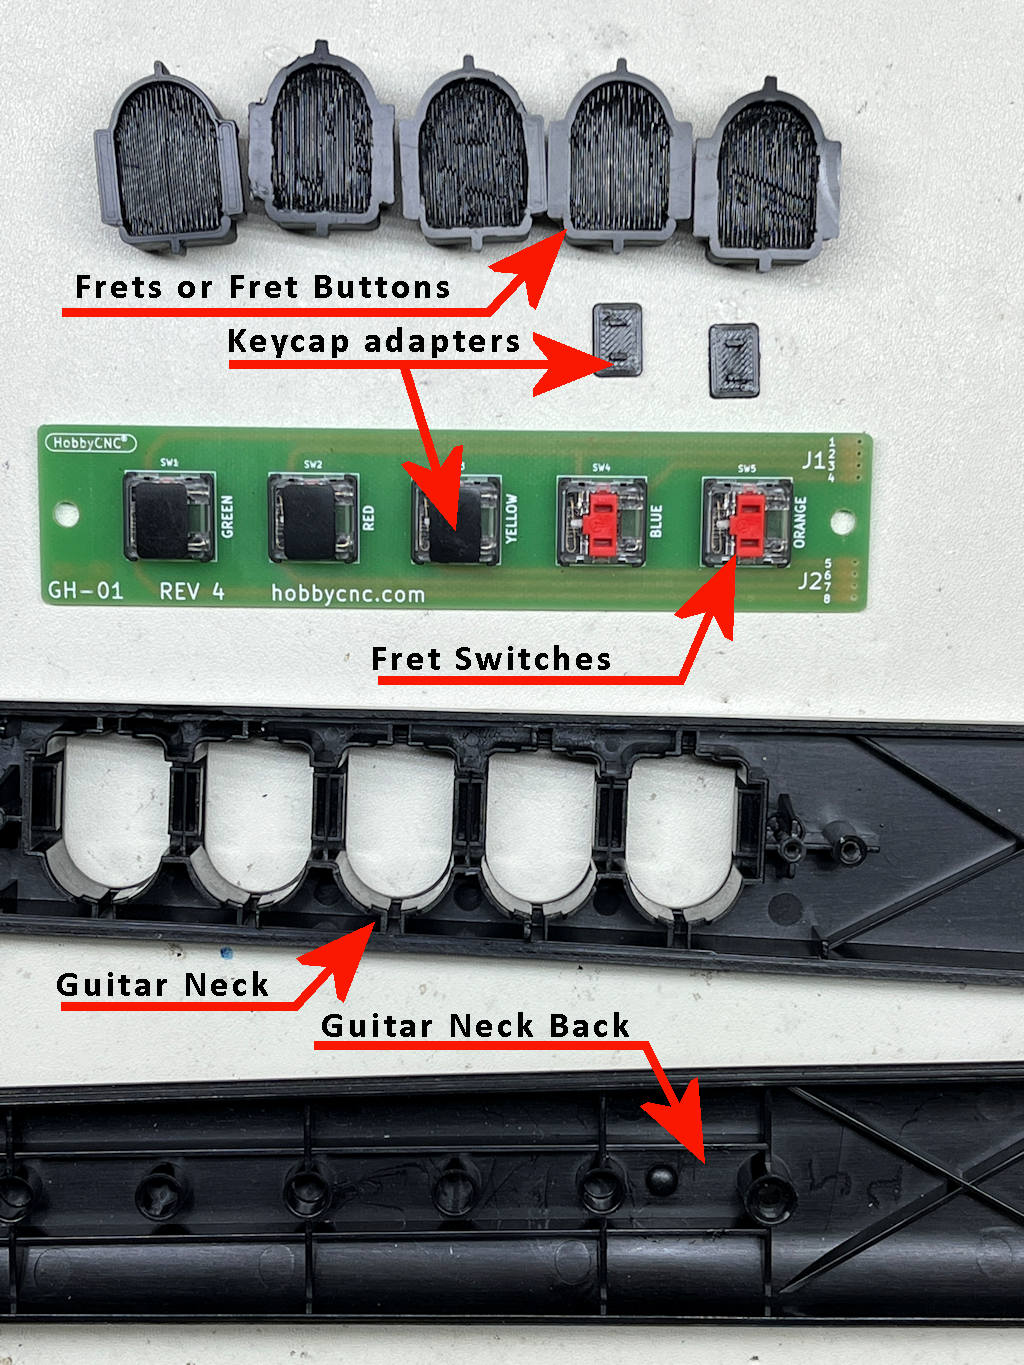
Here’s an image of all the various parts involved in this process.
I really want you to see and understand the difference between the fret and the fret switch.
This also gives you a nice, high-level view of how the concept works.
Assembly Details
Part 1 Test Fit Only (no glue yet)
- Print the fret buttons and keycap adapters.
- Sand/adjust the fret button as necessary so it moves freely in the guitar neck.
- Transfer the little black ‘bumpers’ from your original frets to the newly printed frets. Pay attention to the orientation, there is an in-side and an out-side!
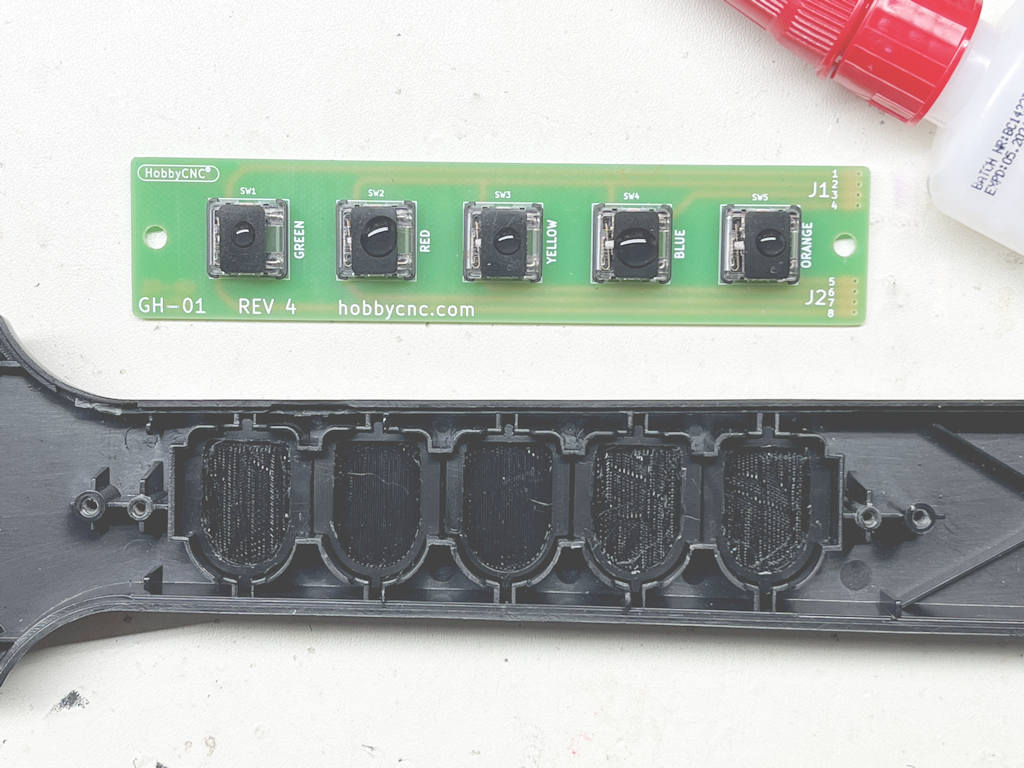
- Place the fret buttons in their desired places in the guitar neck.
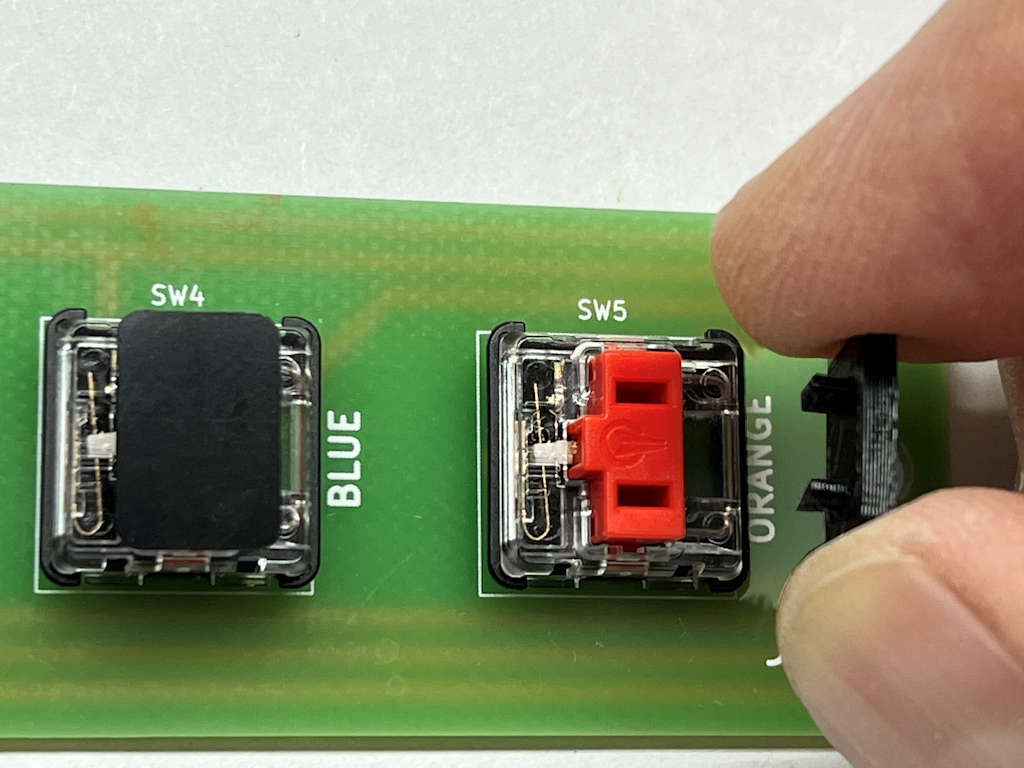
- Place one keycap adapter onto each fret switch. It should stay nicely in place (friction fit).
- install the circuit board with the 5 switches AND keycap adapters onto the guitar neck.
- Place the back of the guitar neck in place and hold firmly together using rubberbands or screws.
Part 2 (yes, glue now)
- Test the ‘feel’. Ideally you want the fret switch to be pressed-in about 1 mm when the fret is NOT being pressed.
The fret button should be held neatly in place by the spring within the switch.
If the fret buttons feel too loose (e.g. they are not in contact with the keycap adapter, you can print keycap adapters of different heights until you get the feel you want.
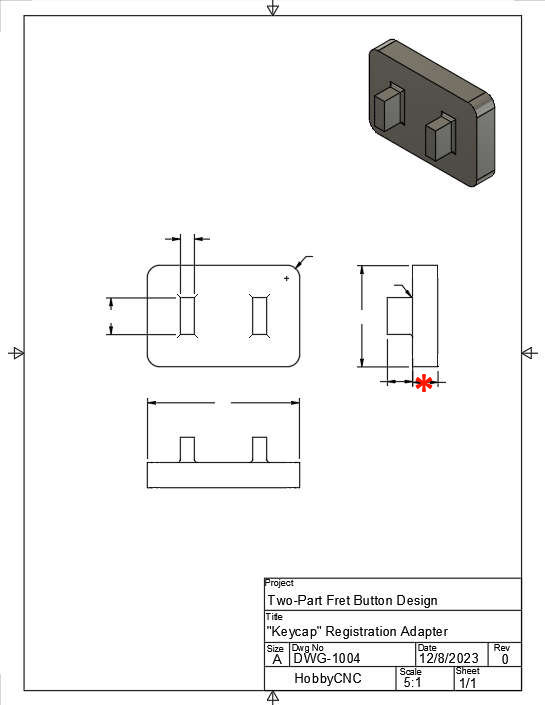
See the red asterisk in the drawing above. This dimension an be altered as necessary. - Press the frets to ensure movement without binding.
- Remove the rubber bands or screws and separate the guitar neck.
Remove the circuit board and fret switches, ensuring the keycap adapters are still attached to each fret switch.
- Put a drop of super-glue on top of each keycap adapter. Be EXTRA CAREFUL to make sure the glue does not overflow the top and get into/onto the fret switch.
- Place the PC board and switches into place on the guitar neck.
- Quickly position the neck back into place and re-apply the rubber bands.
- After all glue is cured, you can remove the back and add the screws to retain the PC Board, then reassemble the guitar neck.

