Guitar Hero fret buttons not working
On a standard Guitar Hero type guitar, the fret buttons (red, green, yellow, blue, orange) sit above a silicon membrane. The membrane contains two conductive electrical pads. This all sits on top of a small printed circuit board (PC Board) that has matching conductive traces that align with the conductive pads on the silicon membrane. When a fret is pressed down, the membrane deforms, allowing the pads on the membrane to contact the mating pads on the printed circuit board, and the electronics are able to register the keypress.
This approach of using a flexible membrane and conductive pads is a super inexpensive method of making thousands-and-thousands (millions even?) of products that work well and are easily mass produced. There are the bare minimum of moving parts and zero alignment/assembly issues.
Here’s some hints on how to get your Guitar Hero fret buttons working again
First Things First
Let’s do the easy thing first. If you have a Les Paul type guitar, then start by cleaning the connector between the body and the neck of the guitar.
Isopropyl Alcohol (rubbing alcohol). Get a Q-tip good and wet with the alcohol and rub down the connectors on the neck and on the guitar body. You can substitute denatured alcohol.
Pink Pencil Eraser. A good-old pink pencil eraser is mildly abrasive and is great for cleaning oxidation or other gunk from the connector. Don’t over do it. After a good rub-down with the eraser, I’d recommend doing the isopropyl alcohol to make sure any residue is removed.
Reassemble the guitar and give it a test. Hopefully this cures the ills.
If not . . .
A little background
Open the Neck
You’re going to have to open the neck of your guitar. There are a boat-load of little screws, typically a Torx T10 size. Here’s an example from HobbyCNC.
The screws are pretty small, so I recommend putting them in a small container like a pill bottle or a zip lock plastic bag.
Visual Inspection
Take a good look around. Take a few pictures with your phone, just in case you need help remembering what went where and how.
Does everything look OK? Everything firmly where it belongs? No broken wires?
Remove the Fret PC Board
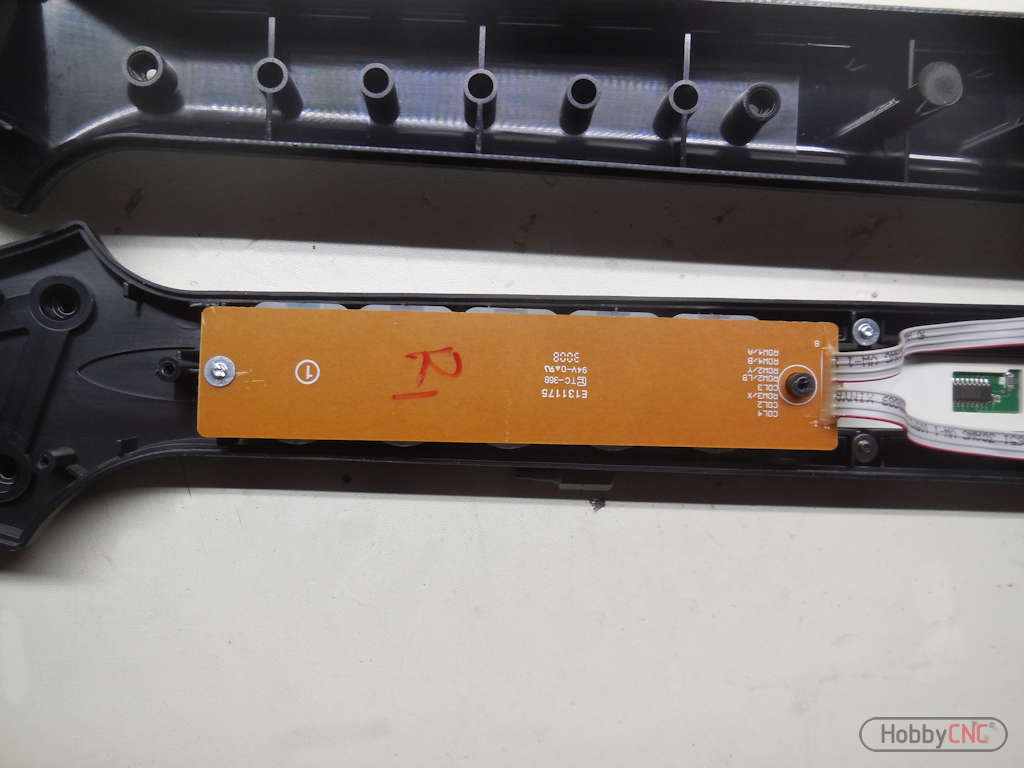
Right behind the fret buttons, you’ll see a small brown PC Board usually held in place with two screws, one at each end, and a ribbon cable that attaches the board to a connector at the guitar-end of the neck. (Figure 1)
Remove the two screws at each end of the Fret PC Board and flip it over (Figure 2)
Inspect and Clean
PC Board: Inspect the PC board for any foreign substance (Mountain Dew, bong water, dust/dirt). In particular, you’re looking at and around the “squiggly Lines” (Figure 3). Use either or both of the techniques above – pink pencil eraser and isopropyl alcohol to clean the contacts.
Clean the whole side of the PC board with isopropyl alcohol.
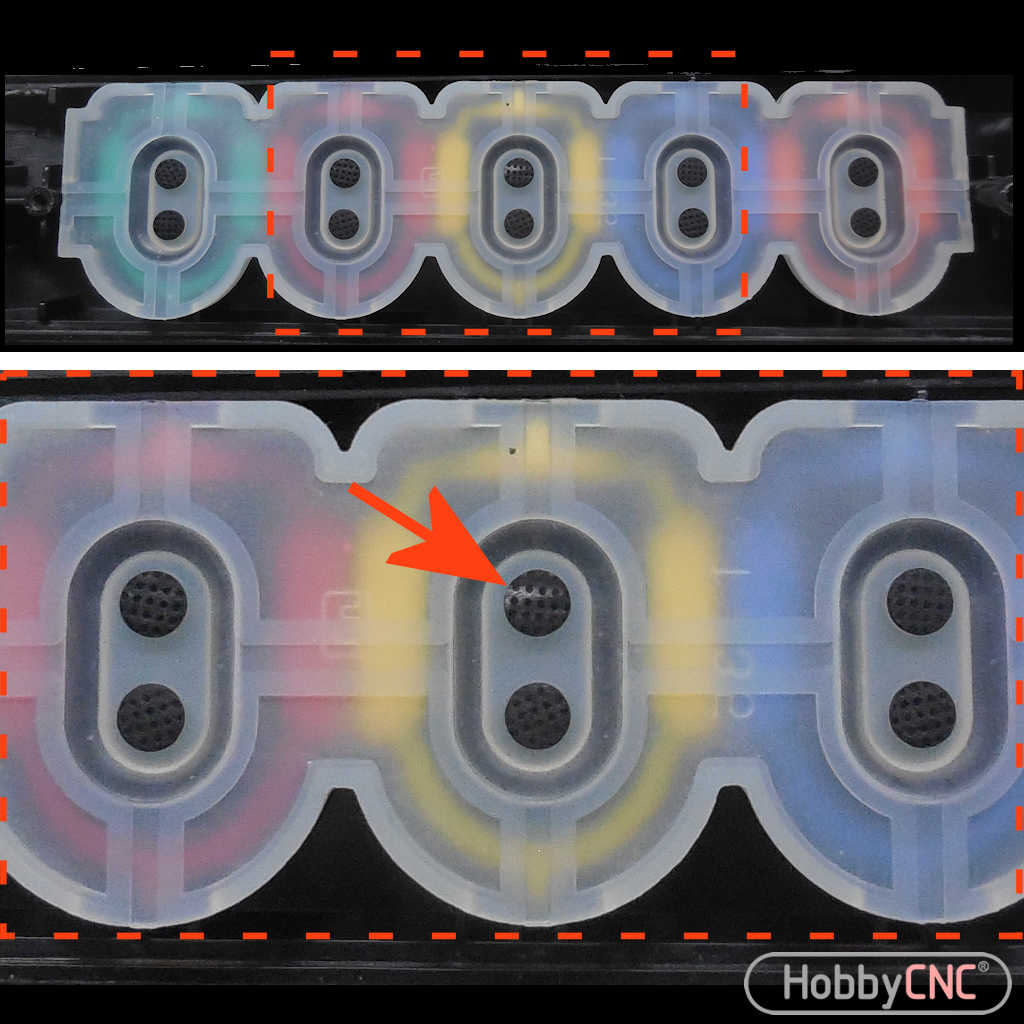
Switch Membrane (Figure 4). Carefully inspect the rubber membrane for any tears or other damage.
Use a Q-tip and alcohol to clean the small black circles that make up the moving part of the switch (Figure 4). Don’t use the eraser technique on these.
Allow a few minutes to dry thoroughly.
Other Tricks
Another possible problem is that the switch membrane (Figure 4) is not firmly pressing onto the mating ‘squiggly’ lines on the printed circuit board. Two hacks here are:
- Put some thick tape on the back-side of the PC board (the side WITHOUT the squiggly lines. This has the effect of moving the PC Board a little closer to the membrane switch and fret keys.
- Add something to the underside of the fret buttons to make them effectively ‘longer’. The idea is the fret will now push down farther on the membrane.
Finally
If these tricks don’t work, or you want to go away from this type of fret switch, there is the option to replace the original switch setup with more reliable mechanical switches.
Read more here; Why upgrade to a mechanical fret board and How to upgrade to mechanical fret buttons.

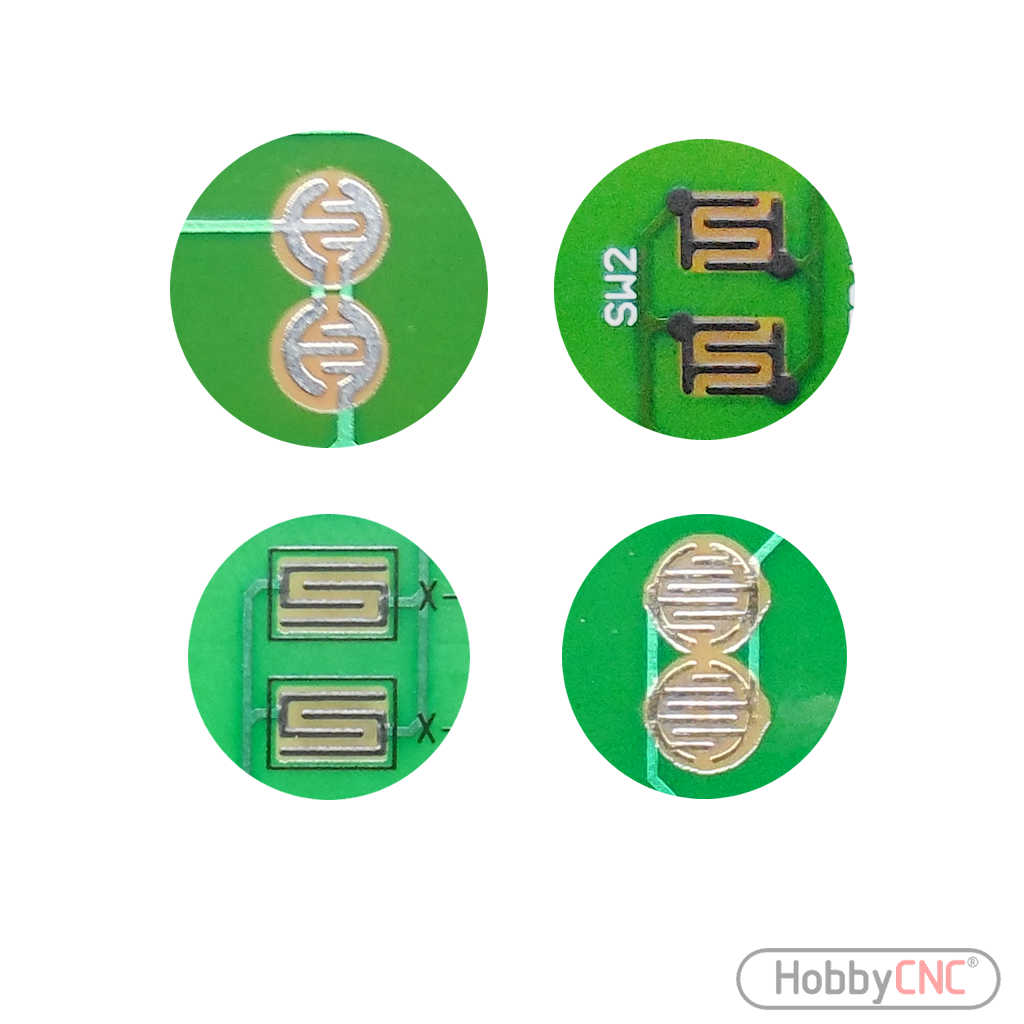
The ‘fingers’ alternate and are connected electrically when the fret button is pushed and one of those black pads touches the ‘squigglies’.