
Preparing 3D printed fret buttons for installation
Carefully inspect the new, 3D printed fret buttons to ensure there are no artifacts remaining on the button:
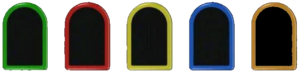
- Make sure you have the proper fret button for your guitar model (no, they are not all the same)
- Look for and remove any very fine ‘strings’
- Review all the sides of every fret button looking for any bumps or ridges that are common in 3d printing. Use an x-acto knife or nail file to remove/smooth
- Look at the underside of the fret button to confirm it is level and free of any excess material
With a sharp tool (like a safety pin), carefully remove the “rubber bumpers” from your original fret buttons.
Make sure you have a safe place to store them.

Look closely at the little ‘rubber bumpers’.
They have an “in” side and an “out” side.
The side with the little ‘bumps’ (top image) faces away from the fret button.
The ‘smooth’ side (lower image) is the side that sits against the side of the fret button.
NOTE: These are a super-enlarged view!

Install the ‘rubber bumpers’ into the fret new 3D printed fret buttons, ensuring proper orientation.
Test-fit the fret buttons in your guitar controller, install the HobbyCNC fret board and fasten with screws. Replace the back of the guitar neck and hold firmly in place with several rubber bands or install 2 screws, one on either side of the fret board.
Test the ‘feel’. The fret button should be partially depressing the switch beneath, and that will hold the fret button in position. When fully depressed, the top of the fret button should be level with the guitar neck. If necessary, use the provided ‘fret shims’ to obtain the proper fit.