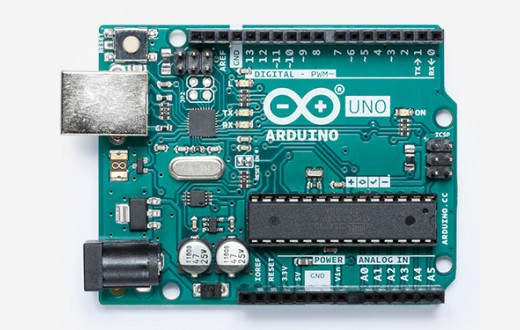
Driving the HobbyCNC board from Arduino with GRBL
HobbyCNC boards accept standard “Step and Direction” TTL level signals via a 25-Pin D male connector.
You can find all GRBL V1.1 configutation settings here.
In the table below I’ve listed all the GRBL settings, the default value (from when you install the software) and the values I changed to support the HobbyCNC PRO Rev 2 board.
I have designed a shield kit to make interface to the HobbyCNC Pro board super easy: Arduino Uno / GRBL to HobbyCNC PRO Shield
The Arduino Uno / GRBL to HobbyCNC PRO Shield includes a 12″ ribbon cable to connect directly to the HobbyCNC 25 pin d connector. The inputs on the PRO board are routed to the shield through opto isolators (it’s not 100% isolated with the PRO rev 2 board).
Currently GRBL only supports 3 axis’, however the Arduino Uno / GRBL to HobbyCNC PRO Shield provides jumpers to allow you to ‘mirror’ any axis (X, Y or Z) to the A axis (HobbyCNC PRO 4 axis board required).


HobbyCNC PRO settings for Arduino Uno R3 with GRBL 1.1
Red text indicates changes from default.
GRBL Settings
| Function | Default | HobbyCNC PRO Setting | Details |
|---|---|---|---|
| step pulse, usec | $0=10 | $0=5 | You want the shortest pulses the stepper drivers can reliably recognize. If the pulses are too long, you might run into trouble when running the system at very high feed and pulse rates, because the step pulses can begin to overlap each other. |
| Step idle delay, milliseconds | $1=25 | $1=254 | Delay 254ms (quarter second) before disabling the stepper motors. When the HobbyCNC PRO board is properly configured (Pin 1 enable), the motors will be cut to half-power when the g-code is done executing. By changing the values of R2, 4 or 6 you can reduce power even more - or remove the resistor to completely power-down that motor. |
| step port invert mask | $2=0 | $2=0 | inverts the step pulse signal. By default, a step signal starts at normal-low and goes high upon a step pulse event. Setting Value Mask Invert X Invert Y Invert Z 0 00000000 N N N 1 00000001 Y N N 3 00000011 Y Y N 4 00000100 N N Y 5 00000101 Y N Y 6 00000110 N Y Y 7 00000111 Y Y Y |
| dir port invert mask | $3=0 | $3=0 | Inverts the direction signal for each axis. exactly like the step port invert mask. You can change the direction of any (or all) axis OR you can swap the wiring. Whatever is easier. |
| step enable invert, bool | $4=0 | $4=1 | By default, the stepper enable pin is high to disable and low to enable. The HobbyCNC PRO needs the opposite: invert the stepper enable pin by typing $4=1. (May need a power cycle to load the change.) |
| limit pins invert, bool | $5=0 | $5=0 | By default, the limit pins are held normally-high with the Arduino's internal pull-up resistor. When a limit pin is low, Grbl interprets this as triggered. For the opposite behavior, just invert the limit pins by typing $5=1. Disable with $5=0. You may need a power cycle to load the change. NOTE: If you invert your limit pins, you will need an external pull-down resistor wired in to all of the limit pins to prevent overloading the pins with current and frying them. |
| probe pin invert, bool | $6=0 | $6=0 | By default, the probe pin is held normally-high with the Arduino's internal pull-up resistor. When the probe pin is low, Grbl interprets this as triggered. For the opposite behavior, just invert the probe pin by typing $6=1. Disable with $6=0. You may need a power cycle to load the change. |
| status report mask:00000011 | $10=3 | $10=3 | Report Type Value Machine Position 1 Work Position 2 Planner Buffer 4 RX Buffer 8 Limit Pins 16 |
| junction deviation, mm | $11=0.01 | $11=0.01 | So if you run into problems where your machine tries to take a corner too fast, decrease this value to make it slow down when entering corners. If you want your machine to move faster through junctions, increase this value to speed it up. |
| arc tolerance, mm | $12=0.002 | $12=0.002 | if you find that your circles are too crude or arc tracing is performing slowly, adjust this setting. Lower values give higher precision but may lead to performance issues by overloading Grbl with too many tiny lines. Alternately, higher values traces to a lower precision, but can speed up arc performance since Grbl has fewer lines to deal with. |
| report inches, bool | $13=0 | $13=0 | By default, it is set to report in mm, but by sending a $13=1 command, you send this boolean flag to true and these reporting features will now report in inches. $13=0 to set back to mm. |
| soft limits, bool | $20=0 | $20=0 | Soft limits requires homing to be enabled and accurate axis maximum travel settings, because Grbl needs to know where it is. $20=1 to enable, and $20=0 to disable. |
| hard limits, bool | $21=0 | $21=0 | Hard limit use physical switches instead. To use hard limits with Grbl, the limit pins are held high with an internal pull-up resistor, so all you have to do is wire in a normally-open switch with the pin and ground and enable hard limits with $21=1. (Disable with $21=0.) |
| homing cycle, bool | $22=0 | $22=0 | https://github.com/grbl/grbl/wiki/Configuring-Grbl-v0.9#grbl-settings |
| homing dir invert mask:00000000 | $23=0 | $23=0 | By default, Grbl assumes your homing limit switches are in the positive direction, first moving the z-axis positive, then the x-y axes positive before trying to precisely locate machine zero by going back and forth slowly around the switch. If your machine has a limit switch in the negative direction, the homing direction mask can invert the axes' direction. It works just like the step port invert and direction port invert masks, where all you have to do is send the value in the table to indicate what axes you want to invert and search for in the opposite direction. |
| homing feed, mm/min | $24=25 | $24=25 | The homing cycle first searches for the limit switches at a higher seek rate, and after it finds them, it moves at a slower feed rate to home into the precise location of machine zero. Homing feed rate is that slower feed rate. Set this to whatever rate value that provides repeatable and precise machine zero locating. |
| homing seek, mm/min | $25=500 | $25=500 | Homing seek rate is the homing cycle search rate, or the rate at which it first tries to find the limit switches. Adjust to whatever rate gets to the limit switches in a short enough time without crashing into your limit switches if they come in too fast. |
| homing debounce, msec | $26=250 | $26=250 | Whenever a switch triggers, some of them can have electrical/mechanical noise that actually 'bounce' the signal high and low for a few milliseconds before settling in. To solve this, you need to debounce the signal, either by hardware with some kind of signal conditioner or by software with a short delay to let the signal finish bouncing. Grbl performs a short delay, only homing when locating machine zero. Set this delay value to whatever your switch needs to get repeatable homing. In most cases, 5-25 milliseconds is fine. |
| homing pull-off, mm | $27=1 | $27=1 | To play nice with the hard limits feature, where homing can share the same limit switches, the homing cycle will move off all of the limit switches by this pull-off travel after it completes. In other words, it helps to prevent accidental triggering of the hard limit after a homing cycle. |
| Max spindle speed, RPM | $30=1000 | $30=1000 | This sets the spindle speed for the maximum 5V PWM pin output. For example, if you want to set 1000rpm at 5V, program $30=1000. If a program tries to set a higher spindle RPM greater than the $30 max spindle speed, Grbl will just output the max 5V, since it can't go any faster. By default, Grbl linearly relates the max-min RPMs to 5V-0.02V PWM pin output in 255 equally spaced increments. When the PWM pin reads 0V, this indicates spindle disabled. Note that there are additional configuration options are available in config.h to tweak how this operates. |
| Min spindle speed, RPM | $31=0 | $31=0 | |
| Laser mode, boolean | $32=0 | $32=0 | |
| x, step/mm | $100=250 | $100=500 | how far each step will take the tool in reality. To calculate steps/mm for an axis of your machine you need to know: The mm traveled per revolution of your stepper motor. This is dependent on your belt drive gears or lead screw pitch. The full steps per revolution of your steppers (typically 200) The microsteps per step of your controller (typically 1, 2, 4, 8, or 16). Tip: Using high microstep values (e.g., 16) can reduce your stepper motor torque, so use the lowest that gives you the desired axis resolution and comfortable running properties. The steps/mm can then be calculated like this: steps_per_mm = (steps_per_revolution*microsteps)/mm_per_rev |
| y, step/mm | $101=250 | $101=500 |
|
| z, step/mm | $102=250 | $102=500 |
|
| x max rate, mm/min | $110=500 | $110=1000 | This sets the maximum rate each axis can move. Whenever Grbl plans a move, it checks whether or not the move causes any one of these individual axes to exceed their max rate. If so, it'll slow down the motion to ensure none of the axes exceed their max rate limits. This means that each axis has its own independent speed, which is extremely useful for limiting the typically slower Z-axis. The simplest way to determine these values is to test each axis one at a time by slowly increasing max rate settings and moving it. For example, to test the X-axis, send Grbl something like G0 X50 with enough travel distance so that the axis accelerates to its max speed. You'll know you've hit the max rate threshold when your steppers stall. It'll make a bit of noise, but shouldn't hurt your motors. Enter a setting a 10-20% below this value, so you can account for wear, friction, and the mass of your workpiece/tool. Then, repeat for your other axes. NOTE: This max rate setting also sets the G0 seek rates. |
| y max rate, mm/min | $111=500 | $111=1000 |
|
| z max rate, mm/min | $112=500 | $112=1000 |
|
| x accel, mm/sec^2 | $120=10 | $120=15 | This sets the axes acceleration parameters in mm/second/second. Simplistically, a lower value makes Grbl ease slower into motion, while a higher value yields tighter moves and reaches the desired feedrates much quicker. Much like the max rate setting, each axis has its own acceleration value and are independent of each other. This means that a multi-axis motion will only accelerate as quickly as the lowest contributing axis can. Again, like the max rate setting, the simplest way to determine the values for this setting is to individually test each axis with slowly increasing values until the motor stalls. Then finalize your acceleration setting with a value 10-20% below this absolute max value. This should account for wear, friction, and mass inertia. We highly recommend that you dry test some G-code programs with your new settings before committing to them. Sometimes the loading on your machine is different when moving in all axes together. |
| y accel, mm/sec^2 | $121=10 | $121=15 |
|
| z accel, mm/sec^2 | $122=10 | $122=15 |
|
| x max travel, mm | $130=200 | $130=200 | This sets the maximum travel from end to end for each axis in mm. This is only useful if you have soft limits ($20) (and homing) enabled, as this is only used by Grbl's soft limit feature to check if you have exceeded your machine limits with a motion command. |
| y max travel, mm | $131=200 | $131=200 | |
| z max travel, mm | $132=200 | $132=200 |