

Installing the Whammy Repair Base
Equipment Required
- Clean workspace
- A small container or plastic bag to hold parts.
- Phillips or Torx T-10 driver (depends on controller type)
- Small flat blade screwdriver
- Needle nose pliers
- Something to raise the guitar body while working (to take pressure off the whammy assembly). Books seem to work well.
Open the Guitar Body
- If the guitar neck is removable, remove it.
- Place the guitar on a raised platform to remove all pressure on the whammy assembly. (Trust me, this is easier than trying to do it on your lap or holding it up manually).
- Remove all screws from the back of the guitar body.
NOTE: There may be one screw under a “warranty void” sticker. - Place all screws in a bag/container.
- Remove the guitar back.
Remove the Whammy Assembly
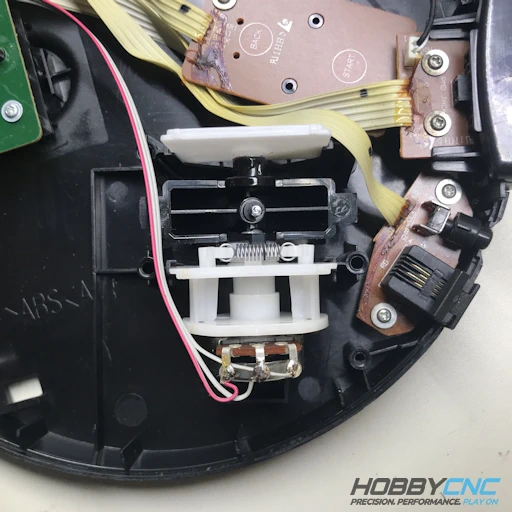
The whammy assembly is a ‘sandwich’ of parts that are only secured in place when installed in the guitar. (Figure 1).
Gently lift the entire whammy assembly straight up – there are no screws to remove, it just comes right out.
CAUTION: be careful to not stress the wiring attached to the whammy potentiometer – either create extra slack in the wire, or carefully remove the potentiometer once it is past the bits that hold it in place.
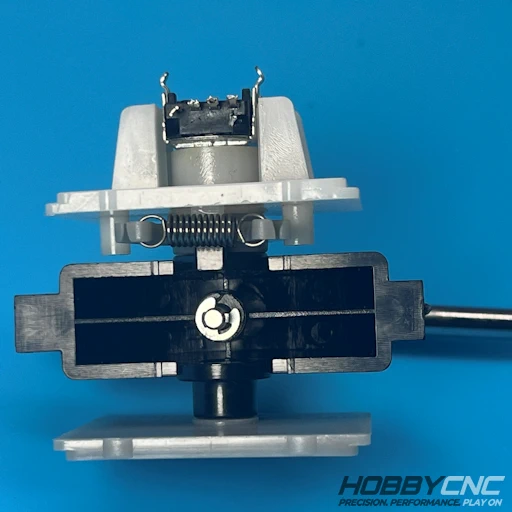
Figure 2 shows the entire whammy ‘sandwich’ removed from the guitar (wires removed for ease of photographing).
At this point, friction is all that is holding the parts together.
Disassemble all the parts
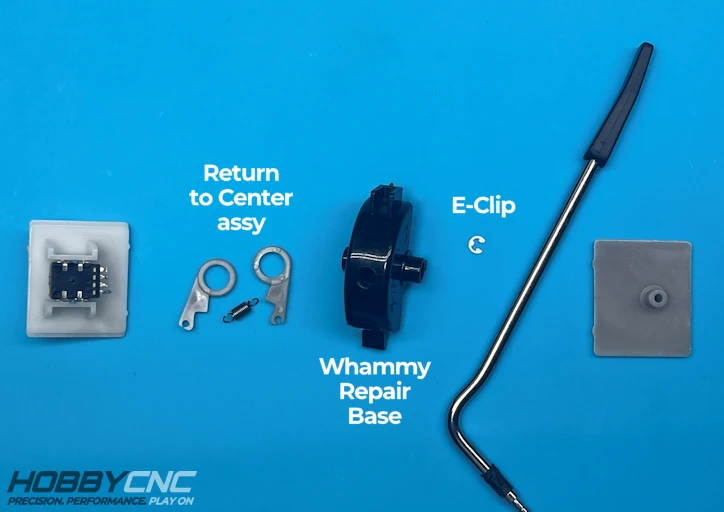
Separate all the components.
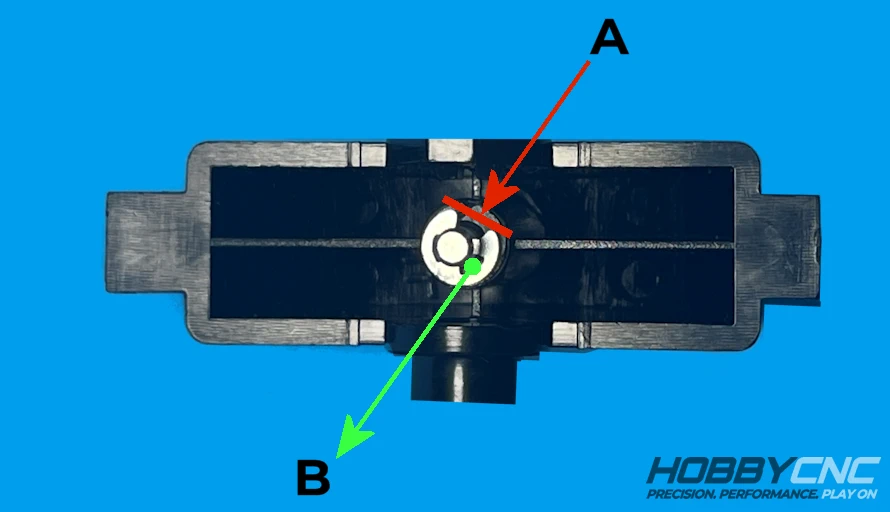
Remove the E-Clip from the whammy bar and pull the whammy bar out of the whammy base.
Option A (Figure 4): With a small flat-blade screwdriver, push evenly against the open end of the E-clip.
Option B: Use a pointed object to grip inside either of the two openings and pull.
Once removed, twist-and-pull on the whammy bar to remove it.
EXERCISE CAUTION – that small E-Clip can pop loose and vanish somewhere in your room/workbench, never to be seen again.
The HobbyCNC Whammy Repair Base ships with a replacement E-Clip, just in case.
Swap the whammy bar to the new Whammy Repair Base
The hole that accepts the whammy bar, in the Whammy Repair Base is provided undersized on purpose.
You will need to drill or file the hole to best fit your whammy bar.
Insert the whammy bar into the Whammy Repair Base and secure it in place by re-installing the E-Clip.
If you do have access to fairly small needle nose pliers (perhaps tweezers?) you can hold the E-Clip firmly and press it into the mating groove on the whammy bar. You can also push it into place with a flat-blade screwdriver, but this does take some skill and luck.
Again: EXERCISE CAUTION – that small E-Clip can pop loose and vanish somewhere in your room/workbench, never to be seen again.
Reassemble the Whammy Assembly
Return-to-Center Mechanism
Review Figure 5 to see the proper orientation of the parts. The two parts are the same, so there is no “right” or “left”.
Place the spring into the notches at the top of these parts (Figure 6)
Now place the Return-to-Center components onto the new Whammy Repair Base (Figure 7)
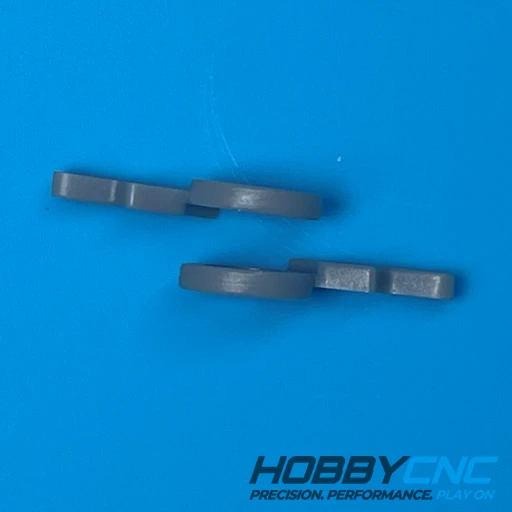
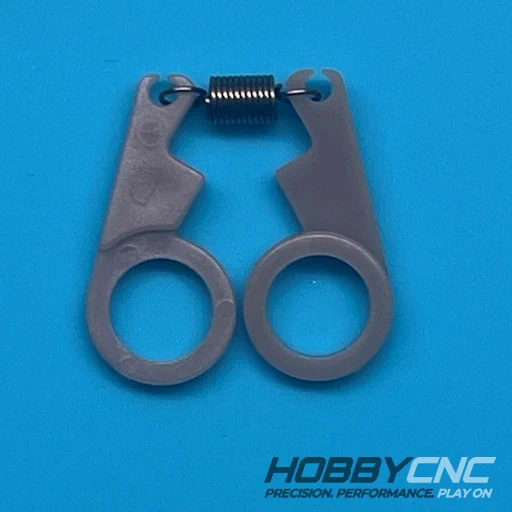
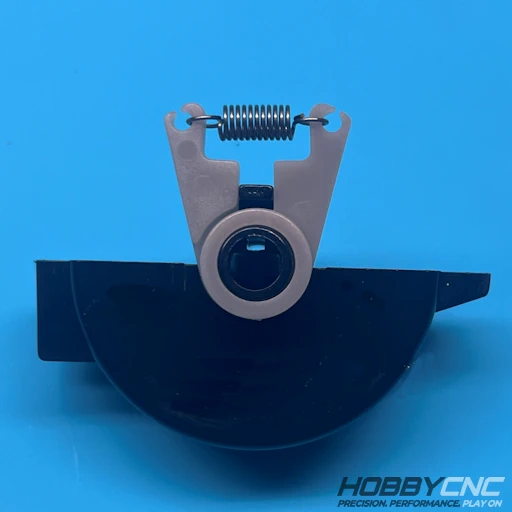
placed onto Whammy Repair Base
Reassemble Whammy “Sandwich”
Align the “D” shaped shaft of the potentiometer with the mating elements in inside the Whammy Repair Base (Figure 8).
Slide the potentiometer and the Whammy Repair Base together and verify that the Return-to-Center assembly fits on either side of the stop pin.(Figure 9).
Add the final side – verify orientation, the shafts are not centered top-to-bottom. (Figure 10).
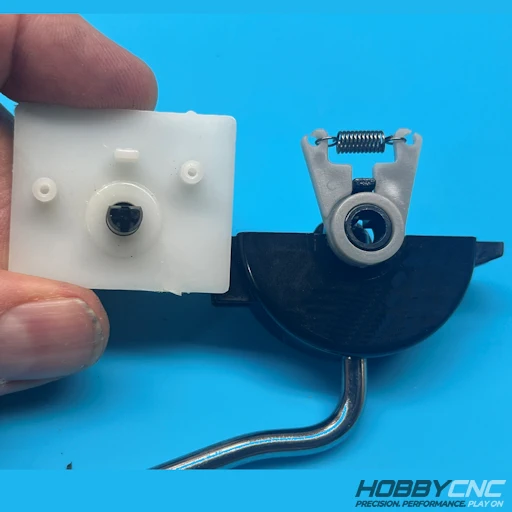
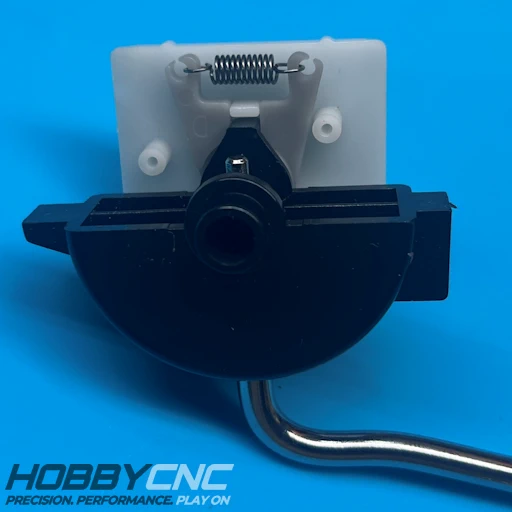
spring assembly combined with potentiometer mount.
Reinstall Whammy Assembly into guitar
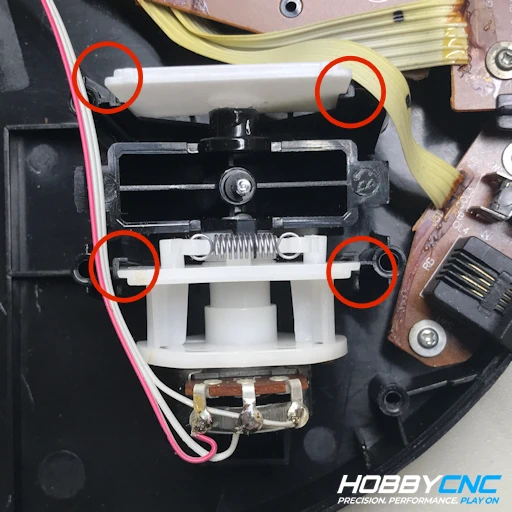
Keep a firm “pinch” on both sides of the whammy bar assembly (Figure 10) to keep it all together.
CAUTION: be careful to not stress the wiring attached to the whammy potentiometer
Thread the whammy bar through the hole in the guitar body.
Carefully align the two side parts into the associated grooves on either side of the whammy hole (red circles in Figure 11).
Reattach Guitar Back.
All done!